Set up your workspace and documents
Add the details that appear on invoices, receipts and statements.
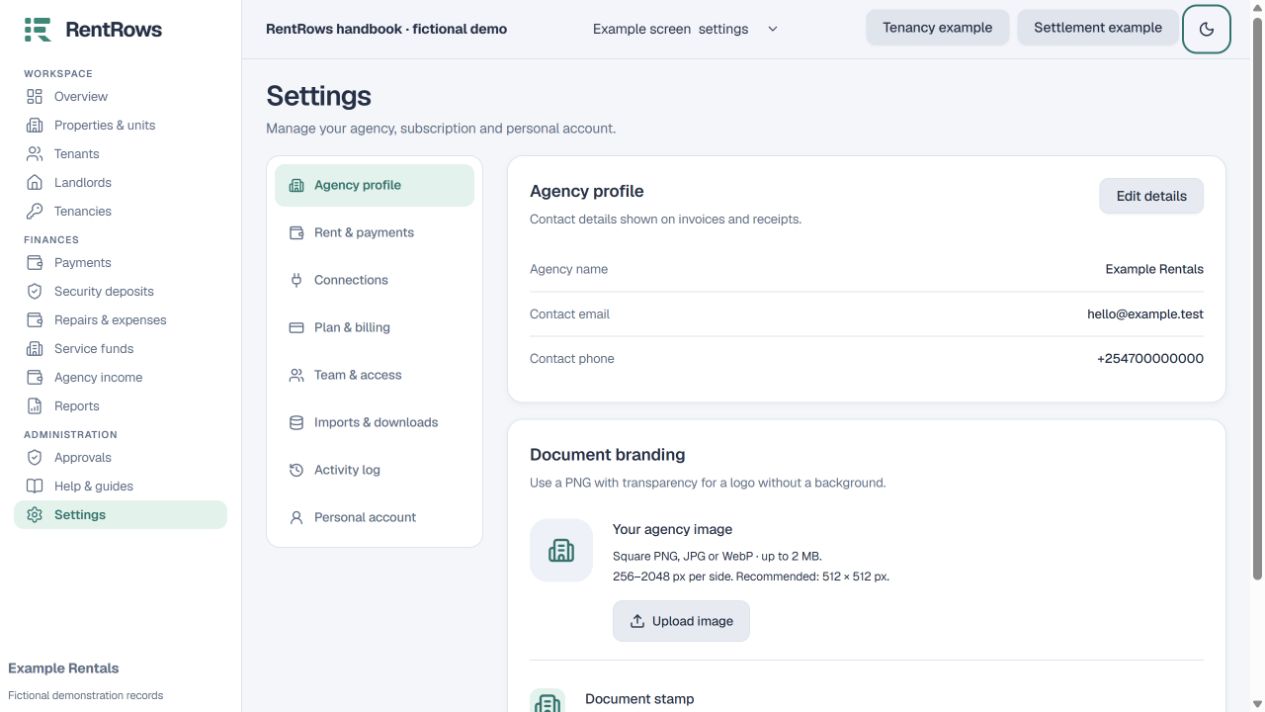
Settings → Workspace details
Before you beginHave your contact details, logo and payment instructions ready.
Follow the steps
- 01
Open Settings and edit your workspace details. Use the business or landlord name you want people to see on documents.
- 02
Check the contact email and phone. Choose your actual collection method and number: Paybill, Till, Send Money, Pochi, bank or cash as available.
- 03
Upload your logo and approved stamp. A logo with a transparent background usually prints best. Check a document preview after uploading.
- 04
Review the default rent due day and deposit settings. Individual tenancies can use different terms; changing defaults is not a substitute for checking each agreement.
- 05
Agency users should review their fee policies. Landlord workspaces keep agency commissions and other owners’ payouts out of daily work.
Check the result
New documents use your saved identity and collection instructions.
Keep going
Still need help?
Tell support which screen you are on, what you expected and what happened. Include a bill or receipt number where useful. Never send passwords, payment credentials or email confirmation links.
Contact support →Open your workspace →